Installing Classic Industries Tetra Gauges in a 1936 Ford Coupe
I had a few requirements for the gauges I would purchase. First off, they have to look good in a 1936 Ford Dash. Size and fit was also a big deal. Being all electric and not mechanical was also on my list. Using GPS for the speedometer. Searching on the Internet brought me to Classic Industries.
I called Classic Industries and talked with Cliff about the gauges. Classic Industries has excellent customer service/sales. I verified what I could expect in the package I was buying. I also wanted the option to have turn signal and high beam indicators. He also informed me that any of there dealers could take the special order with the options I wanted. You also get a better price by ordering from most dealers.
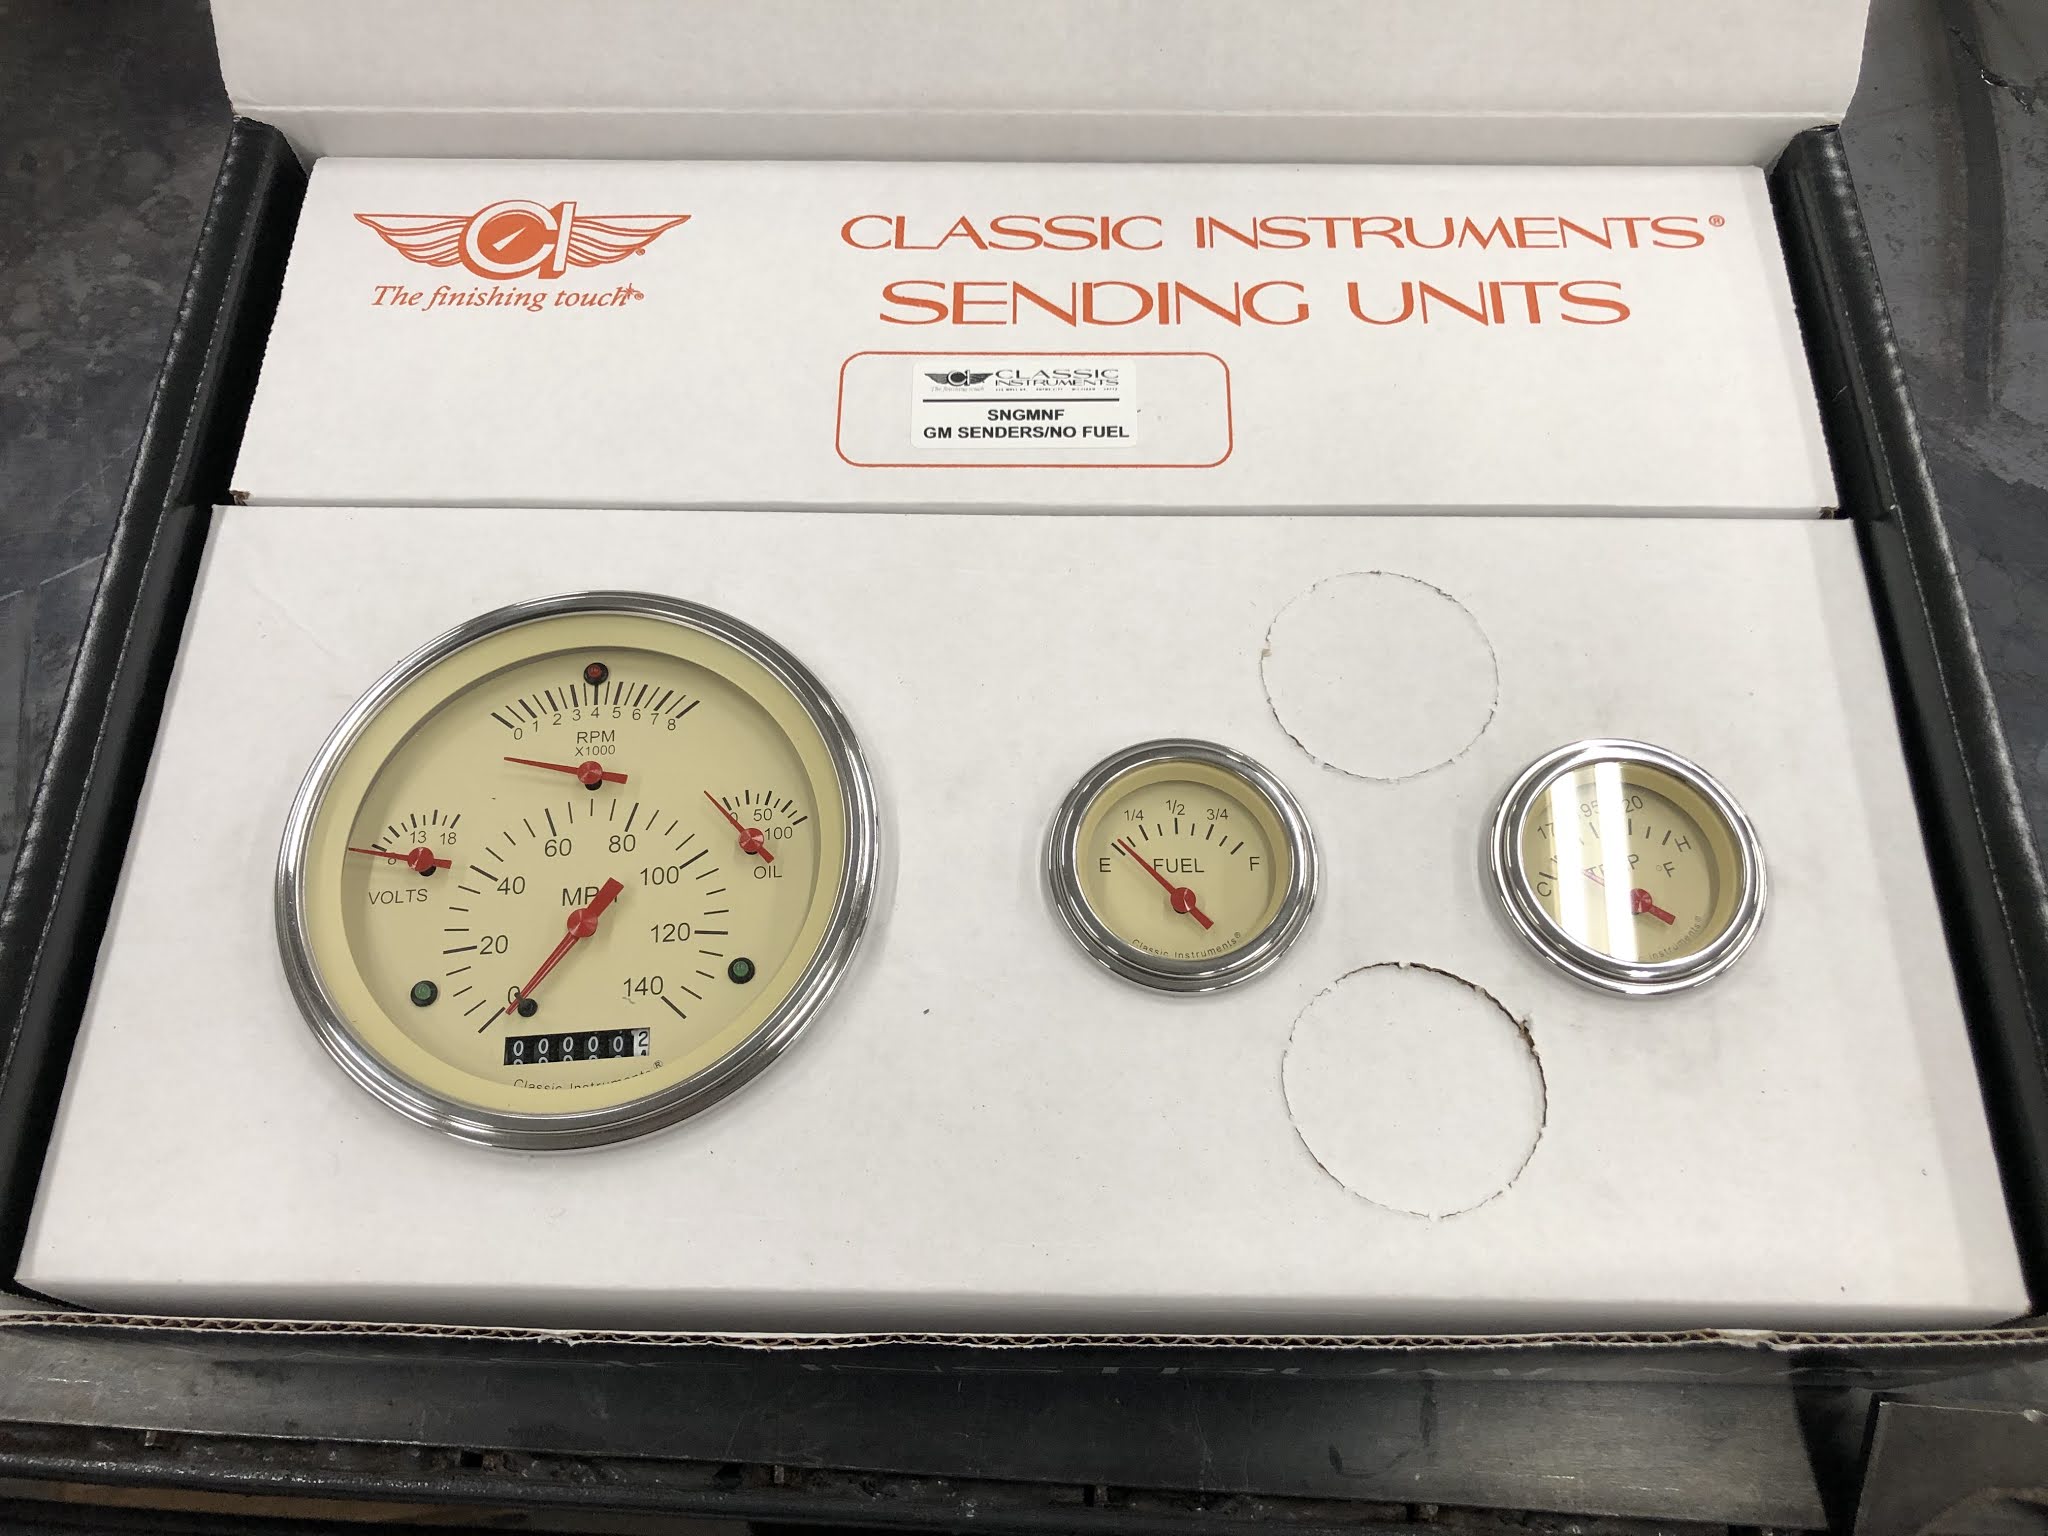
So I called Summit Racing. They took all my my car information(motor, trans,options wanted,tank sensor,etc.) and called Classic Industries while I waited on the phone. So I ordered the gauges. The part number was TE01TSLF. A week later I had the Tetra Series gauges with turn signal and high beam indicators. I was impressed that I got a custom order in that short of time.
The gauges were very well packed. They look awesome!
Very nice packaging.
There was paper protecting the faces of the gauges. The rear box contained all the mounting, cables and sensors needed.
Nice decals and also a thank you note!
Notice paper installation manual, mounting hardware, water temp and oil pressure sensors. There is also a pulse generator(SN16) that plugs into my TH350 transmission speedometer mechanical output.
I did alot of research on the size of the guages. I knew I would have to enlarge the dash for the installation of the main cluster. The main cluster is 4-5/8" OD. I just took a die grinder and enlarged the hole by 1/8". No big deal. I also took a sanding roll and smoothed the hole out after using the burring bit in the die grinder.

The two smaller gauges had a diameter of 2.070. The hole size in my dash was 2.375. So I looked at the easy route of just using a bezel that would adapt from 2.375 to the gauge size of 2.070. No such luck. I also thought it would look weird with the bezel adapters only on the two smaller gauges.
So I decided to take the hard core approach. That was to make some sheet metal plugs. Plug the two smaller holes and use a hole saw to get the correct size to fit the gauges. This wasn't as bad as I thought it would be. Yes, It does take some time, about 3 hours.
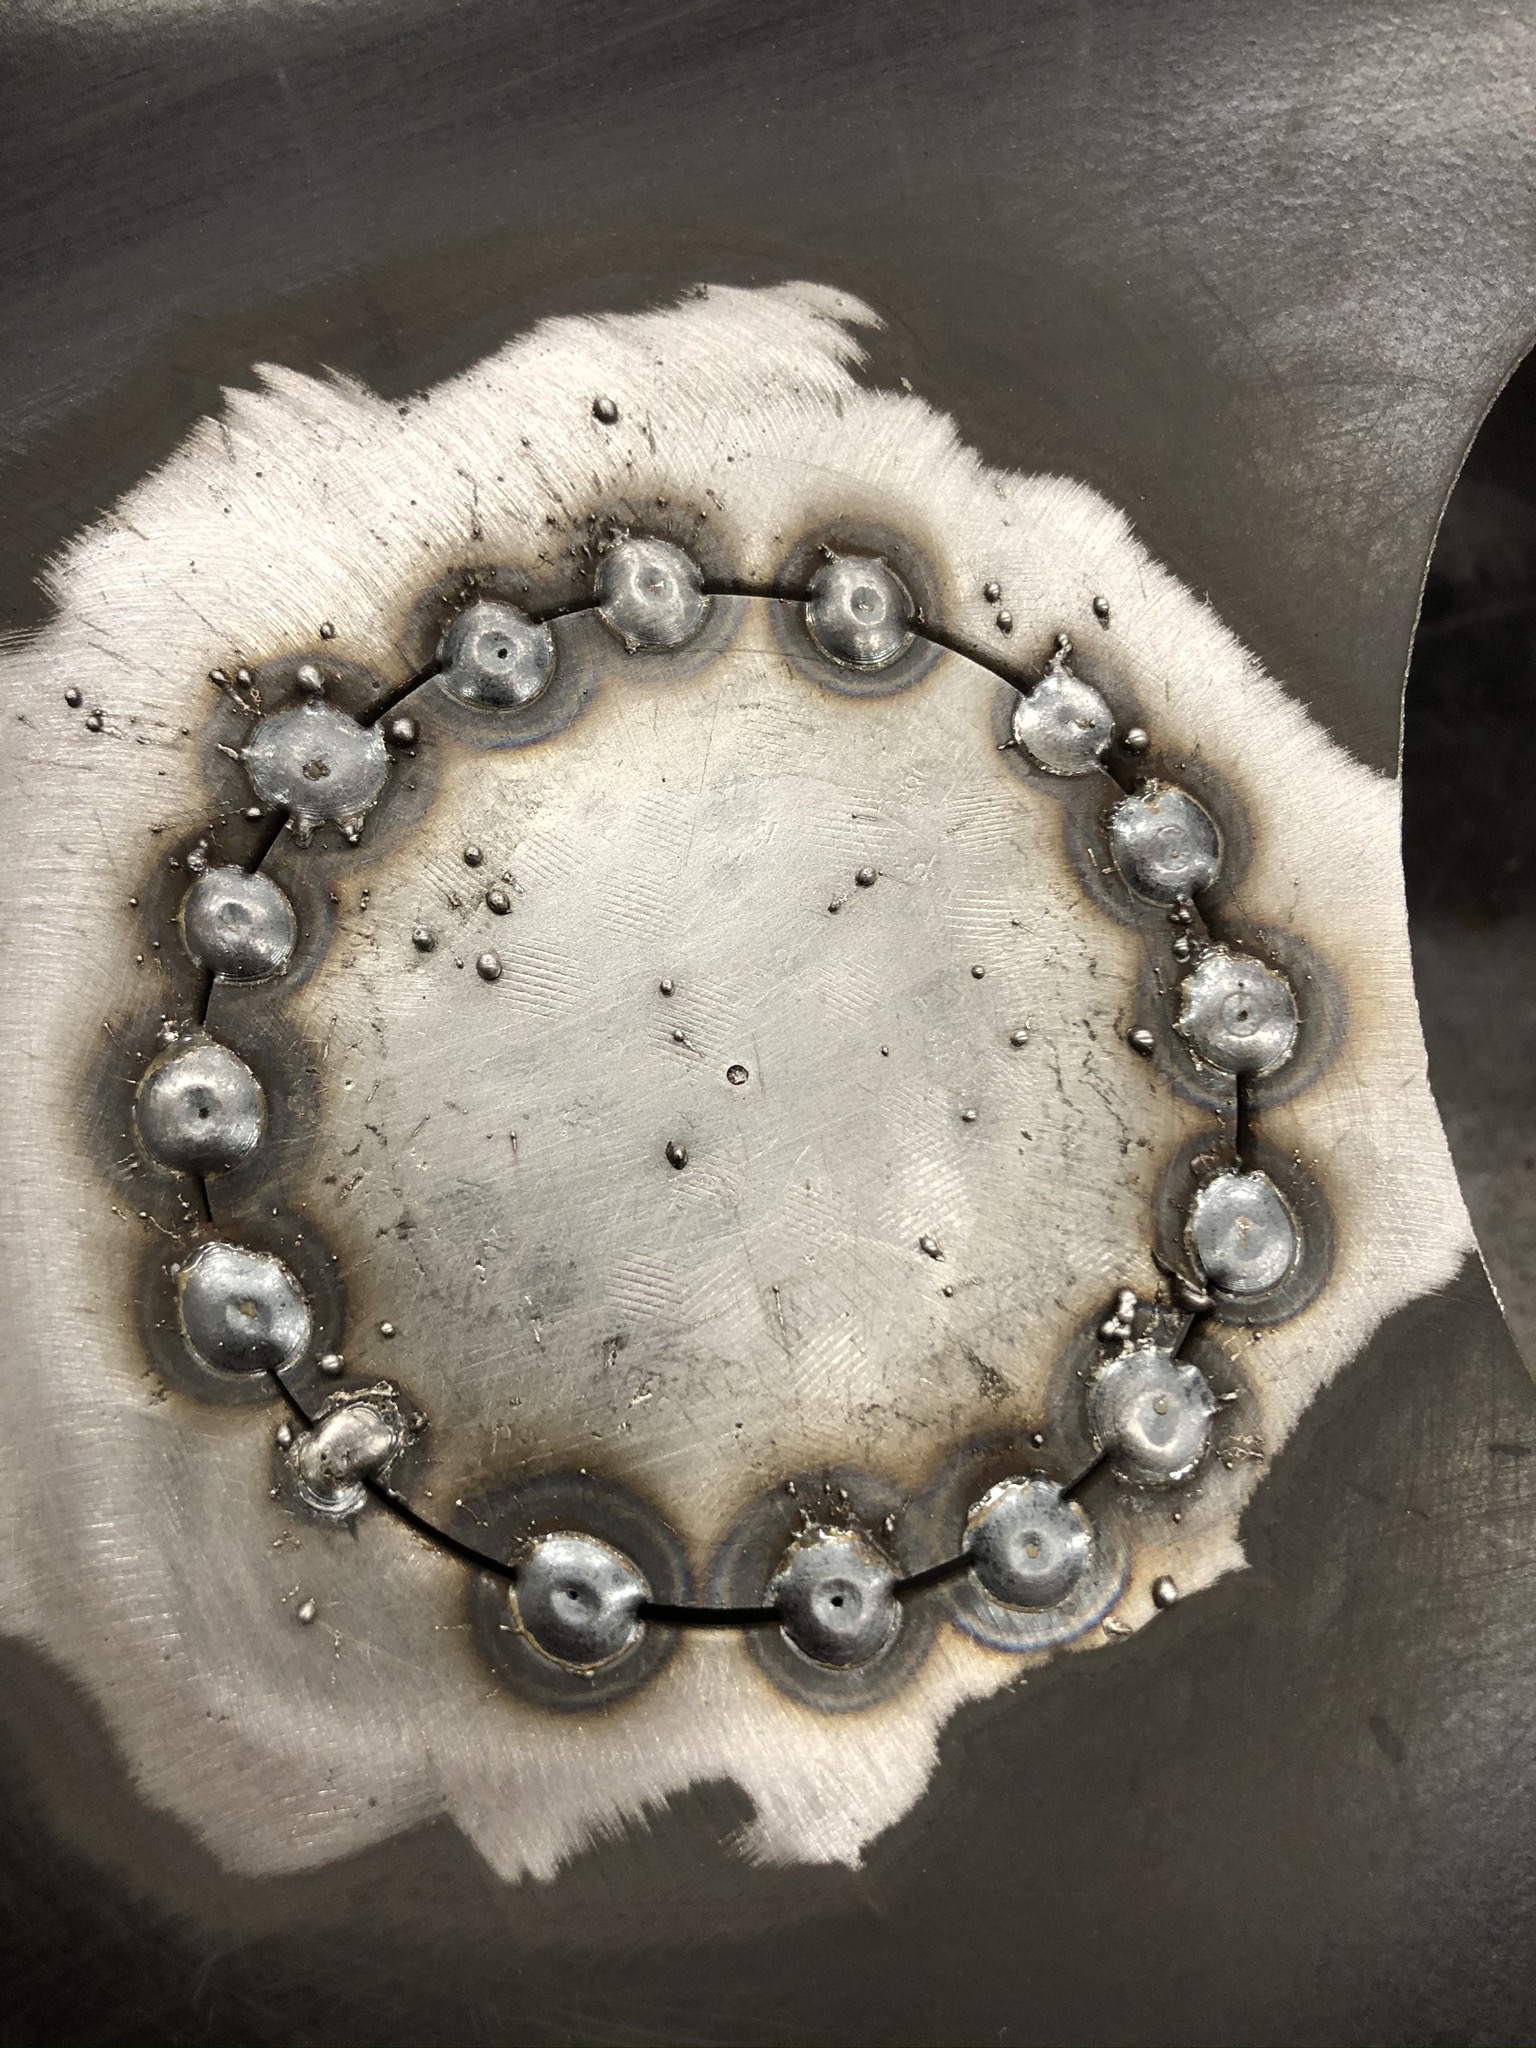
The first step in the process was to create the plugs for the dash. I took some .065 sheet metal and marked a center location. The center location was located using a compass and a center punch. The center punch is critical to get the correct sizing and location throughout the process. With the compass I laid out the outer diameter of 2.375. Using my sheet metal shear, I removed as much material around the plug as I could. Few minutes on the grinder and I had round plugs.
I removed all the primer around the gauge holes. Magnets were used to hold the plugs while I tack welded. After using the shears make sure your plugs are still flat. Also make sure you center the plugs before you start tack welding. Notice the center punch in the middle of the plug. You can also see the scribed line for the small gauge hole in this picture.
Take your time to weld in the plug to avoid warping the dash. Also use .023 wire in your Mig welder to minimize weld material that will have to be ground down.
After the initial tack welds and letting the dash cool down. I did some more tack welds.
After the plugs are completely welded, use a flapping disk to remove the tack weld material. Take your time and include cooling time between grinding to keep from warping the dash. I ground the welds pretty much flat and then used a DA sander to finish with. If you keep using the flapper disk you may create divots from grinding to far.
Using the center punch marks. Scribe new lines for the gauges at 2.070. Then its time to create the new gauge holes. The biggest hole saw I had was 1-3/4". So I used that and used the die grinder to get to 2.070. I had the scribed lines so it was very easy to grind out the holes to the correct size.
A quick check to make sure they fit before I prime.
After priming with the gauges installed. I also plug welded another hole in the dash that was drilled for a choke cable.


Comments
Post a Comment